
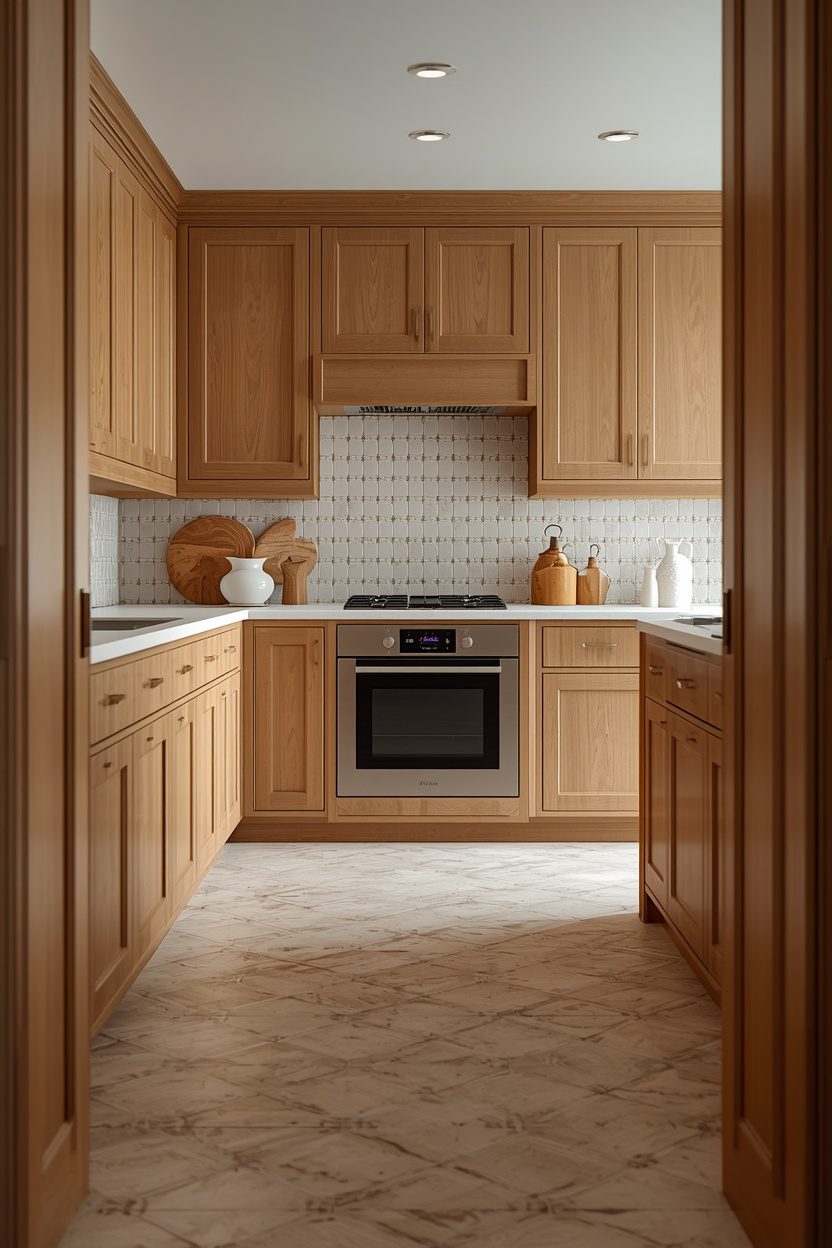
Most kitchen tile advice treats the backsplash as if it exists in isolation — ignoring the floor underfoot, the wall behind open shelving, and the transition zones where different surfaces meet. That disconnect is why so many kitchens end up with a beautiful backsplash sitting above a mismatched floor tile that nobody planned together. The kitchen tile ideas in this guide cover the full room: floor, wall, and backsplash as a coordinated system.
Each of the 15 ideas below names the tile material, the surface it belongs on, the format and layout pattern, and how it relates to the cabinets and countertop around it. I have flagged slip-resistance ratings for floor tiles, porosity concerns for wall tiles near water, and the real maintenance each material demands — because a tile that looks stunning in a showroom but stains within six months is not a good recommendation.
1. Large-Format Porcelain Floor Tile in Concrete Finish
A 600 × 600 mm or 600 × 1200 mm porcelain tile in a concrete or cement-look profile gives a kitchen floor the industrial-modern texture of polished concrete without the cracking, sealing, or cold-underfoot problems of actual concrete. Choose a rectified tile (laser-cut edges) so you can use a minimal 2 mm grout joint, and select a colour in warm gray or greige rather than cool blue-gray to keep the kitchen inviting. Lay the tiles in a straight grid for a modern read or a staggered brick pattern for more movement.
This tile is virtually maintenance-free — no sealing required, resistant to stains and scratches — and it pairs with every cabinet style from flat-panel modern to shaker traditional. For underfloor heating compatibility, check the manufacturer specs, but most large-format porcelain tiles conduct heat efficiently.
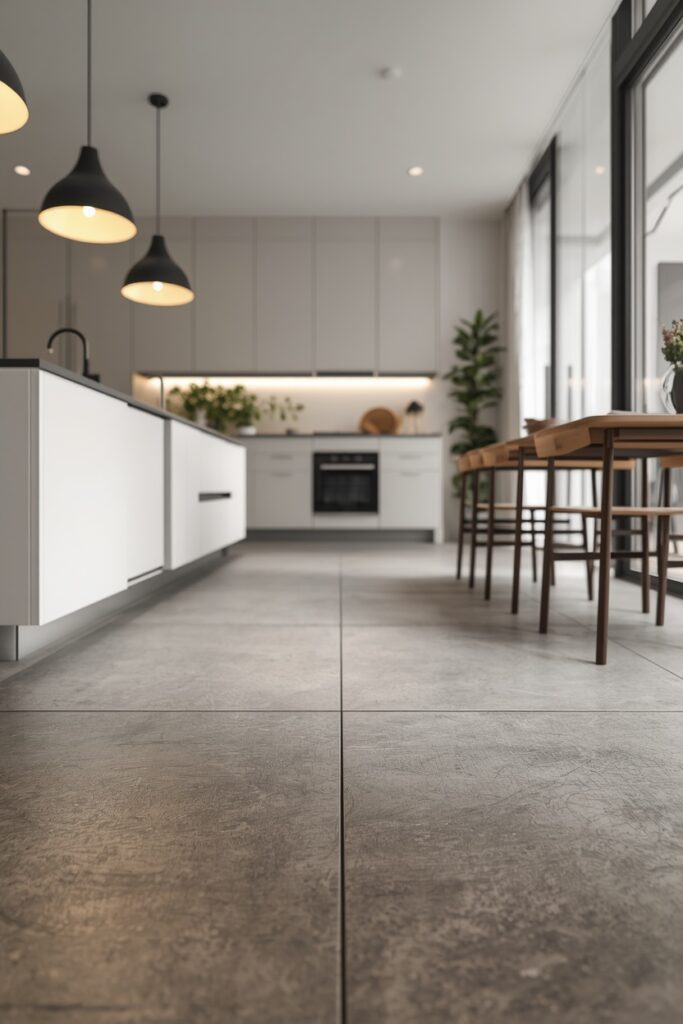
The R10 slip rating is the minimum for kitchen floors; R11 gives more grip in wet zones near the sink and dishwasher.
2. Encaustic Cement Floor Tile With Geometric Pattern
Encaustic cement tiles on a kitchen floor turn the ground plane into the room’s visual centrepiece. These handmade tiles — typically 200 × 200 mm — feature bold geometric patterns pressed in pigmented cement, and no two tiles are perfectly identical, which gives the floor an artisanal character. Lay them in a straight grid so the pattern reads clearly, and use a matching grout colour that recedes behind the design. The critical maintenance step is sealing: apply a penetrating impregnating sealer before grouting, grout with unsanded grout, then seal again after. Without this regimen, the porous cement absorbs spills and stains within minutes.
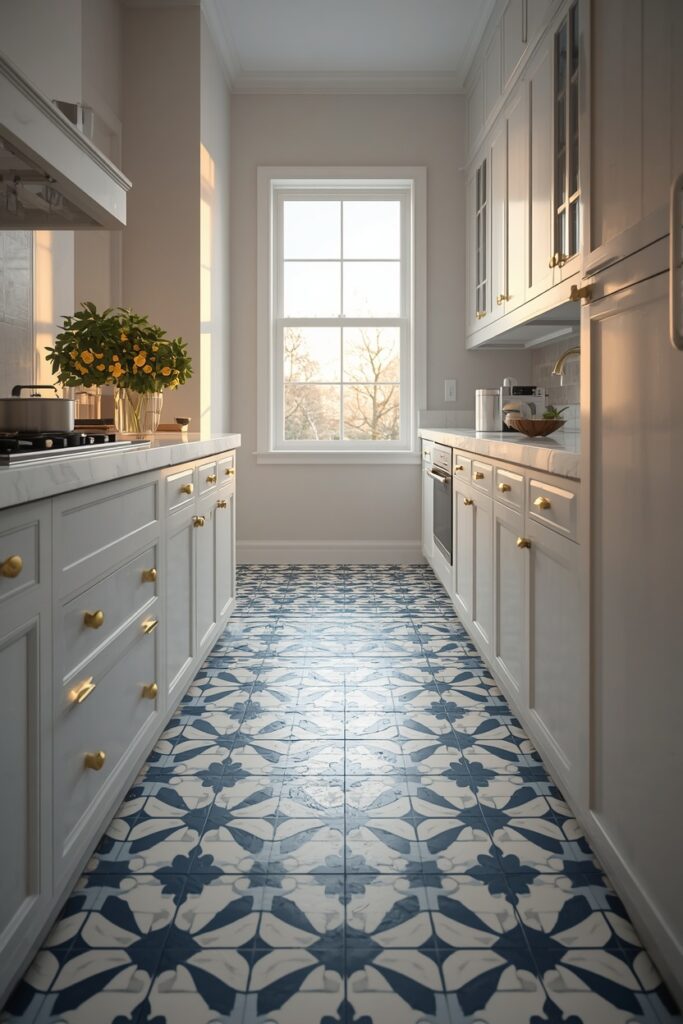
Re-seal annually in a high-traffic kitchen. Pair these floors with simple, solid-colour cabinets and a plain countertop — the floor pattern is the statement, and competing patterns above will create visual chaos. One practical note: cement tiles are softer than porcelain and can chip under heavy dropped objects like cast-iron pans.
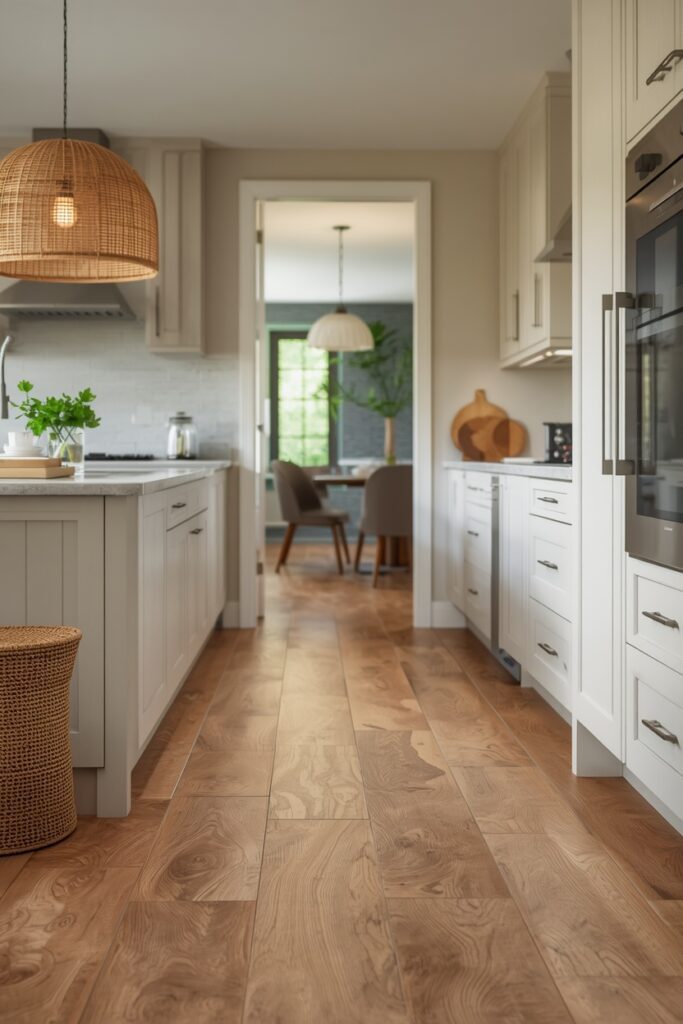
3. Wood-Look Porcelain Plank for Warm Kitchens
Wood-look porcelain planks give you the visual warmth of timber flooring without the warping, water damage, and scratch vulnerability that real wood suffers in a kitchen environment. Choose a plank format — 150 × 900 mm or 200 × 1200 mm — in a warm oak, walnut, or hickory grain with a textured surface that mimics genuine wood grain. Lay them in a staggered running bond with the planks running the longest dimension of the kitchen to elongate the space visually. Grout should be a matching wood tone in a 1.5–2 mm joint so the floor reads as continuous planks rather than a grid of tiles. These tiles carry an R10 or R11 slip rating, which is appropriate for kitchen use. The one limitation compared to real wood is the cold feel underfoot — pairing with underfloor heating solves this completely and most porcelain planks are compatible. This floor coordinates well with white, cream, or sage cabinetry and stone or quartz countertops.
4. Terracotta Floor Tile for Mediterranean Kitchens
Terracotta floor tiles — square or hexagonal, typically 200 × 200 mm or 150 mm hex — bring a handmade warmth that pairs naturally with Mediterranean, farmhouse, and earthy modern kitchens. The irregular surface and colour variation from tile to tile is part of the charm, creating a floor that looks like it has been there for decades even when freshly installed. Choose tiles with a slightly tumbled or hand-shaped edge rather than machine-cut precision for authenticity. Grout should be a warm sand or terracotta tone to maintain the continuous earthy surface. The sealing requirement is serious: terracotta is one of the most porous floor tiles available, and without a proper seal it absorbs water, grease, and colour from spills almost instantly.
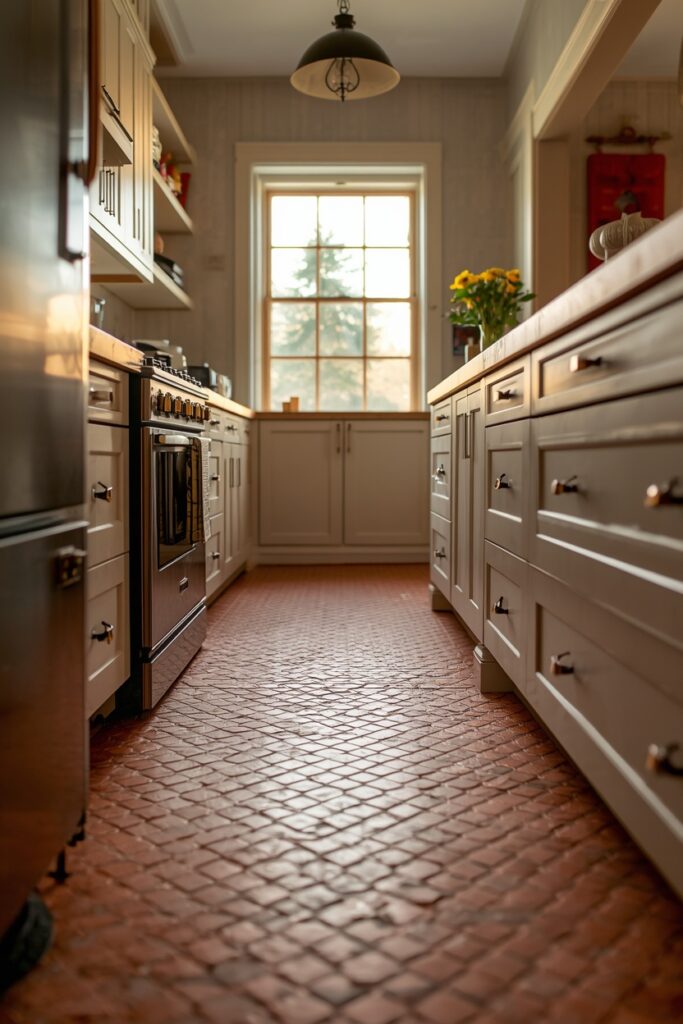
Seal before grouting, seal after grouting, and re-seal every 12 to 18 months. Pair with cream or sage cabinetry, butcher-block countertops, and brass or iron hardware. Under a kitchen island, terracotta floors glow when combined with warm pendant lighting overhead.
5. Kitchen Tile Ideas With a Checkerboard Floor
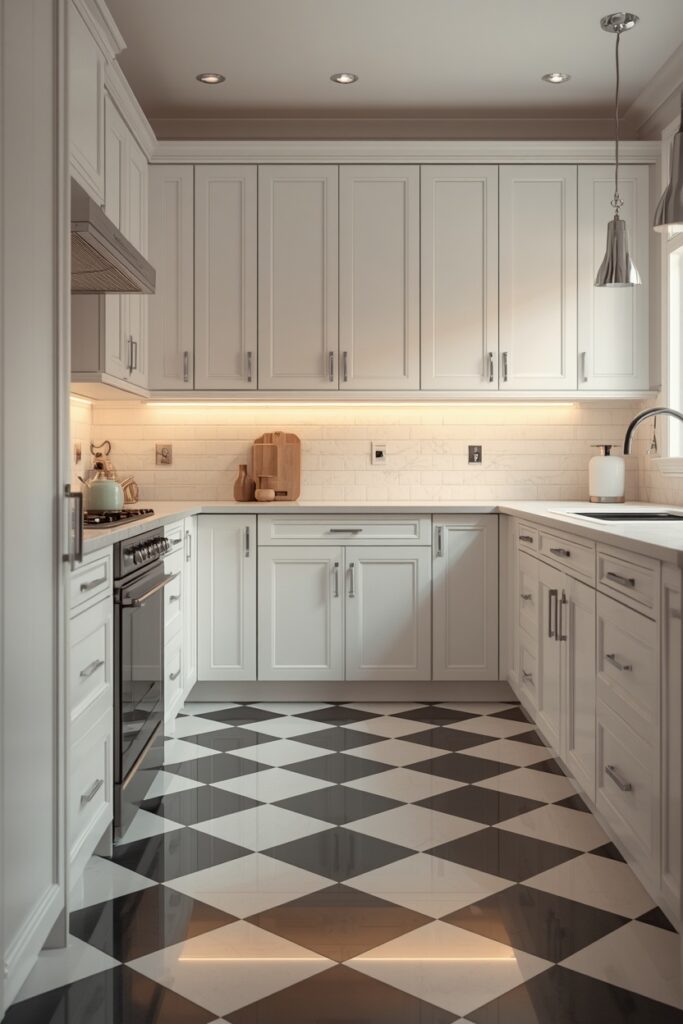
A black-and-white checkerboard floor is one of the oldest tile patterns in kitchen design, and it endures because the graphic contrast anchors a room with unmistakable character. Use 300 × 300 mm porcelain tiles in true black and warm white, laid on the diagonal for maximum visual impact. The diagonal orientation makes the floor appear wider, which suits narrow galley kitchens especially well. Grout should match or closely complement each tile — a medium gray serves both colours without standing out against either. This pattern suits traditional, transitional, and retro kitchens paired with white shaker or dark-painted cabinets.
One design rule: keep the backsplash and countertop simple when the floor is this bold — a solid white or cream backsplash and a clean stone countertop let the checkerboard command the room without competition. The porcelain versions require no sealing and clean with a standard pH-neutral floor cleaner.
6. Zellige Wall Tile From Counter to Ceiling
Taking zellige tile from the countertop to the ceiling — rather than just the standard backsplash height — turns an entire kitchen wall into a shimmering, handmade surface. The irregular glaze of each zellige tile catches light differently, creating a rippling luminosity that deepens as the surface area grows. Use a 4 × 4 inch or 2 × 6 inch format in a warm white, soft terracotta, or pale sage, with a minimal 1 mm grout joint in a matching tone.
This full-wall treatment suits kitchens with open shelving rather than upper cabinets, allowing the tile to read as a continuous backdrop. Mount shelving brackets through the tile with appropriate anchors and waterproof the area behind the sink with a membrane before tiling. The cost per square metre is higher than standard ceramic, and the installation requires skill because each tile’s irregular thickness demands individual back-buttering.
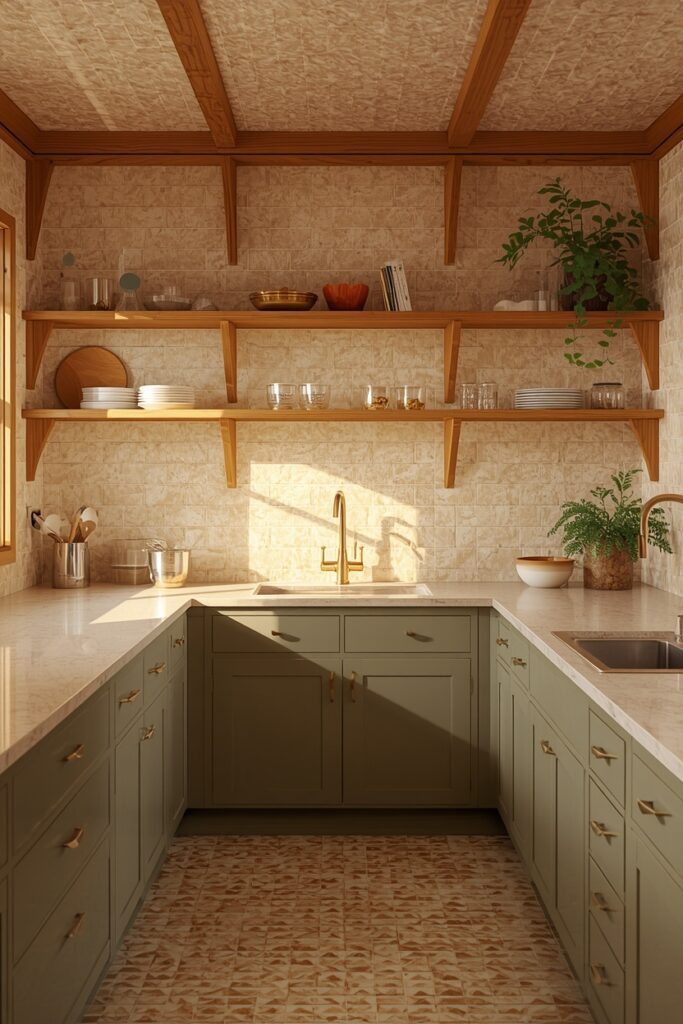
The result, however, is a kitchen wall that has the depth and character of an old-world artisan space.
7. Hexagonal Floor Tile in Natural Stone
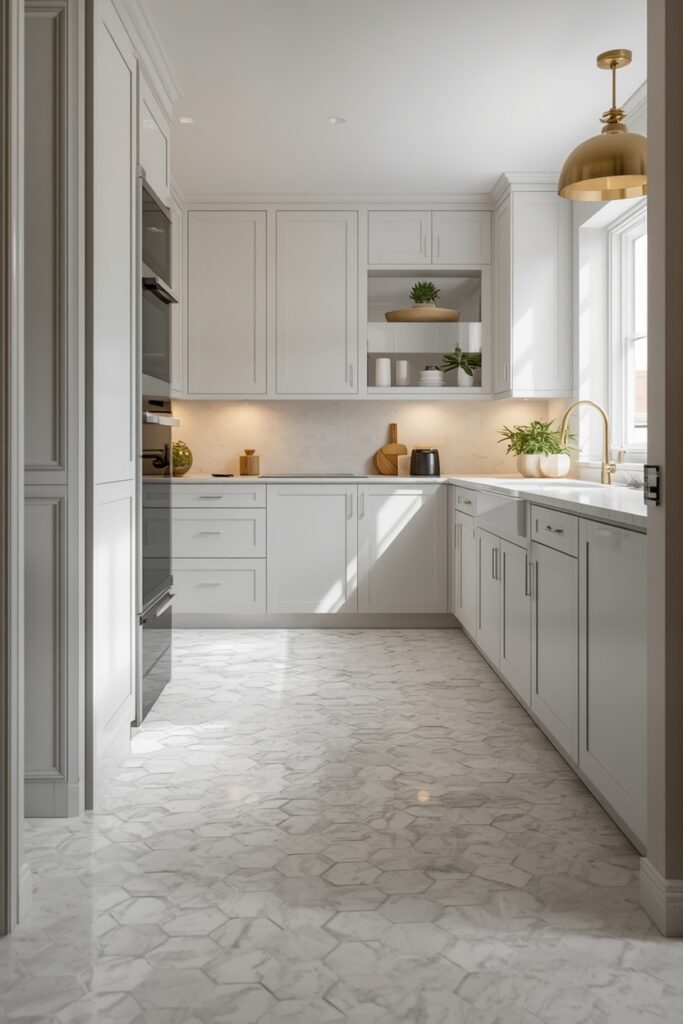
Hexagonal floor tiles in natural marble or limestone — typically 100 mm or 150 mm across — create a honeycomb pattern that reads both classic and contemporary depending on the stone type and surrounding cabinetry. Carrara marble hexagons in a honed surface suit white and gray kitchens, while warm limestone hexagons complement cream, sage, and wood-toned cabinets. Use a matching light-coloured grout in a 2 mm joint for a clean, unified look. Honed surfaces are the practical choice over polished for kitchen floors because they resist showing water spots and provide better grip when wet. Natural stone hexagons require sealing — a penetrating impregnating sealer applied at installation and refreshed annually — to prevent staining from oil, wine, and coloured liquids. The installation is more labour-intensive than large-format tiles because the smaller size means more grout joints and more cutting at borders. Budget an additional day of labour compared to a standard rectangular tile installation of the same area.
8. Subway Wall Tile in a Non-Standard Colour
The standard subway tile gains new energy when you shift the colour away from white. A soft sage green, dusty blue, warm clay, or matte charcoal subway tile — still the familiar 75 × 150 mm or 3 × 6 inch format — changes the kitchen’s mood entirely while keeping the installation simple and the cost accessible. Apply it from countertop to the underside of the upper cabinets in a running bond or straight stack, with a grout colour that either matches the tile for a tonal wash or contrasts gently for more grid definition.
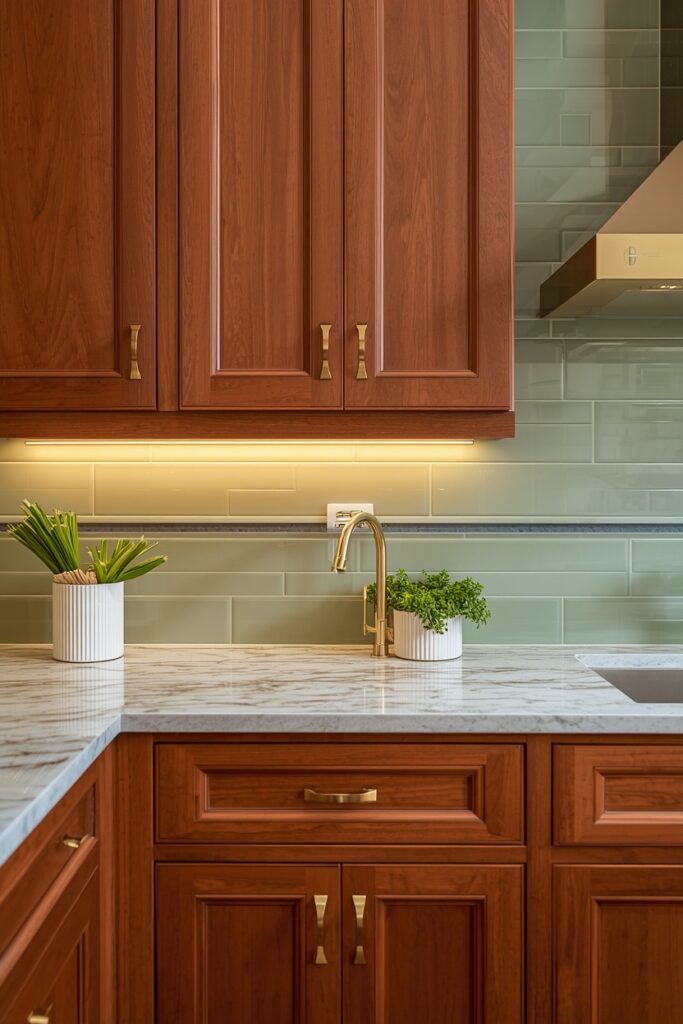
Pair sage or blue tiles with warm wood cabinets and brass hardware; pair charcoal with white cabinets and chrome fixtures; pair clay with cream cabinetry and oil-rubbed bronze. The colour selection should coordinate with the countertop: avoid placing cool-toned tiles against warm-toned counters without a bridging element like a warm grout or warm hardware to mediate the temperature difference.
9. Herringbone Floor Tile in Porcelain
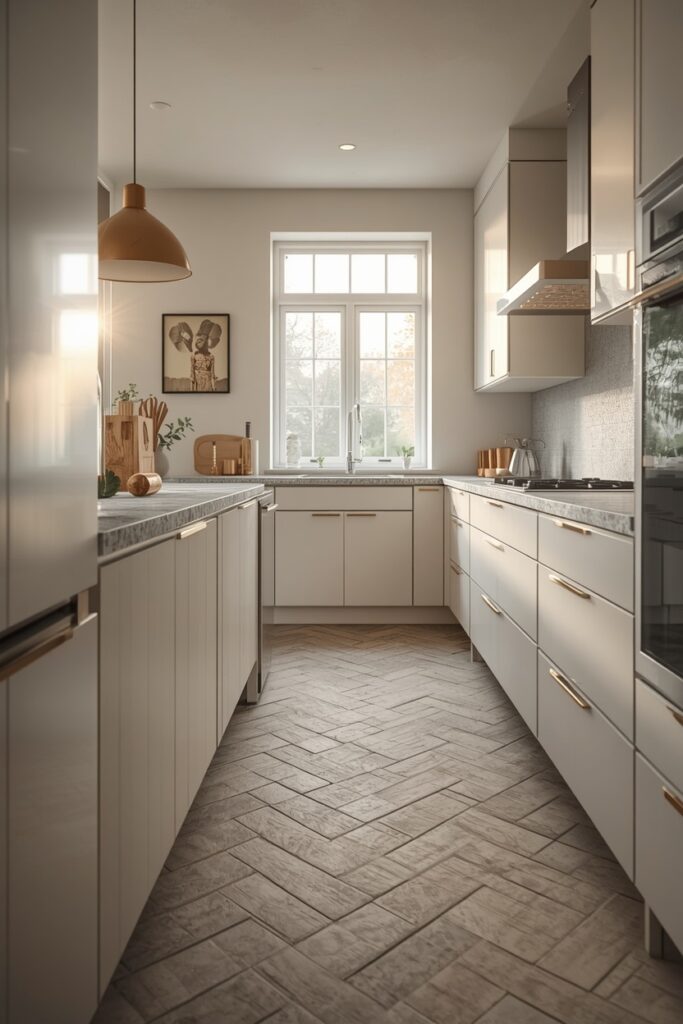
A herringbone layout on a kitchen floor adds dynamic movement that a standard grid or running bond cannot match. Use a porcelain tile in a rectangular format — 100 × 300 mm or 75 × 300 mm — in a neutral tone: warm gray, soft cream, or a marble-look with subtle veining. The herringbone pattern works best when it runs along the longest axis of the kitchen, pointing the eye toward the window or focal wall. Grout should be a matching or close-complementary colour to let the pattern read without harsh grid lines. This layout requires more cuts and more waste than a straight lay — budget 15 to 20 percent extra material.
A rectified tile with precise edges is essential for herringbone because any inconsistency in tile dimensions compounds across the chevron pattern. Pair this floor with simple flat-panel or shaker cabinets and a clean countertop so the floor pattern leads the design. The porcelain surface needs no sealing and offers an R10 or R11 slip rating suitable for kitchen use.
10. Kitchen Tile Ideas With Mixed-Material Coordination
The most polished kitchens coordinate two or three different tile materials across the floor, backsplash, and feature wall — and the coordination is what separates a designed kitchen from a tiled one. A common successful pairing: large-format porcelain on the floor in a neutral concrete or stone look, a handmade zellige or subway tile on the backsplash in a complementary colour, and a painted or plastered wall above. The bridging principle is shared undertone: if the floor tile has a warm gray base, the backsplash tile should also carry warmth rather than a cool blue or green undertone.
Grout colour should stay in the same family across surfaces for visual consistency. Limit the tile count to a maximum of two distinct materials — a third risks visual noise.
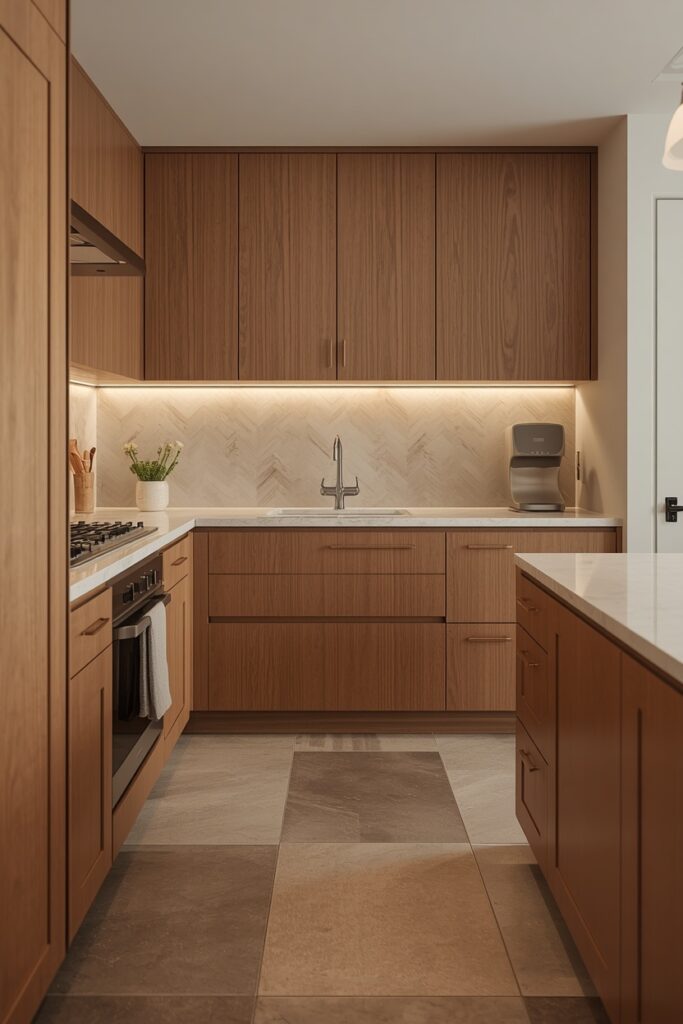
Test the combination by holding physical samples of both tiles together against the countertop material under the actual kitchen lighting before ordering full quantities.
11. Penny Round Floor Tile for Small Kitchens
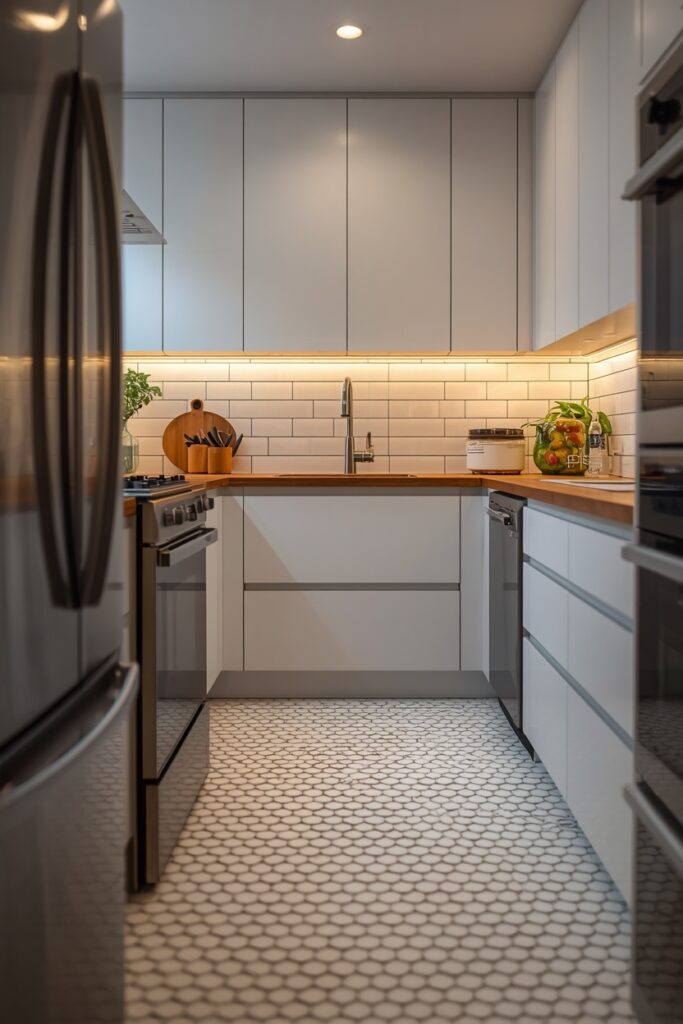
Penny round tiles — 20 mm diameter circles on mesh sheets — create a floor texture that adds visual interest in small kitchens where large-format tiles would show too few joints to create a pattern. The small scale and busy texture actually make a compact kitchen floor read as more intentional. Choose a single colour — matte white, soft gray, or pale sage — with matching grout for a clean, seamless surface. The high ratio of grout to tile means maintenance is important: seal the grout at installation with a penetrating sealer and wipe up spills promptly. For slip resistance, specify a matte or textured glaze rather than a high-gloss glaze — the matte surface provides better grip when wet. This tile pairs well with simple subway backsplashes and clean countertops because the floor provides enough visual complexity on its own. Installation is faster than individual tile placement because the mesh sheets cover large areas quickly, though cutting around kitchen island bases and appliance bays requires patience and a tile nipper.
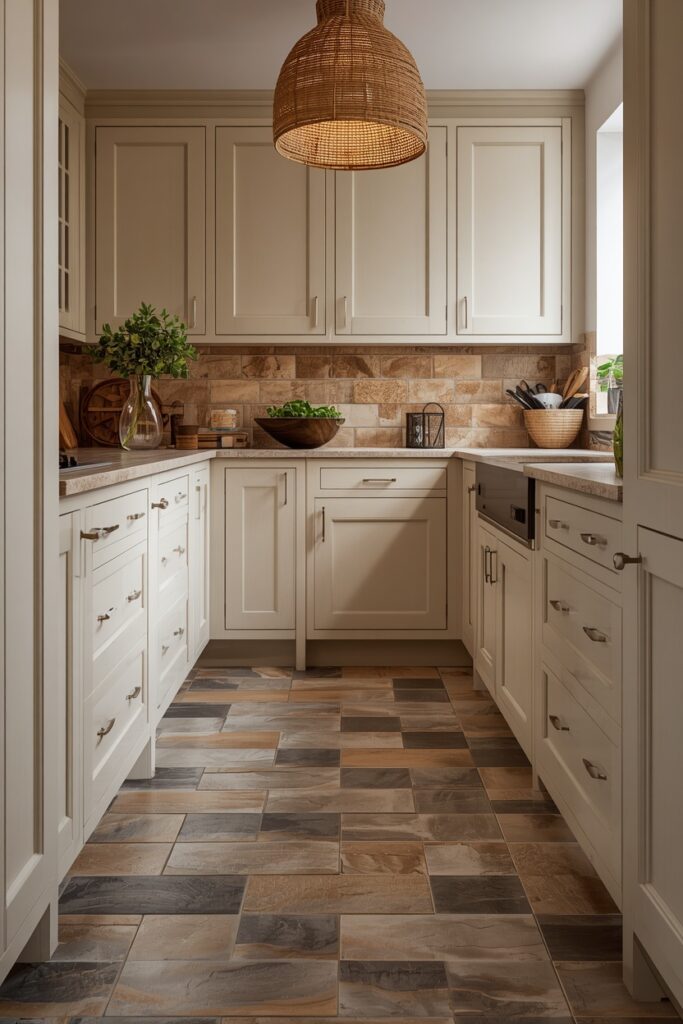
12. Natural Slate Floor Tile for Rustic Kitchens
Natural slate brings a rugged, textured surface to a kitchen floor that is impossible to replicate with porcelain imitations. Each tile carries unique layered striations, colour variation from charcoal to rust to green, and a slightly uneven surface that gives the floor a handcrafted, grounded character. Use a calibrated slate — tiles gauged to a consistent thickness — to simplify installation, and choose a cleft (natural split) surface for maximum texture or a honed surface for a smoother feel underfoot. Slate requires sealing at installation with a natural stone sealer and re-sealing every one to two years. The natural colour variation means you should dry-lay a section before grouting to distribute colour evenly and avoid clustering tiles of the same shade.
This floor pairs with cream, white, or warm wood cabinetry and dark hardware in iron or oil-rubbed bronze. In a farmhouse or rustic kitchen, slate flooring anchors the room with an authenticity that manufactured tiles cannot approach.
13. Brick-Format Wall Tile for Industrial Kitchens
Brick-format tiles — long, slim rectangles in a 65 × 250 mm or similar format — bring industrial texture to a kitchen wall without the maintenance and pointing issues of actual brick. Choose a tile with a slightly irregular surface and warm tones: honey, russet, or aged gray. Lay in a running bond pattern with a 5 mm grout joint in a complementary warm tone for an authentic brick-wall effect. This tile suits the full wall behind open shelving or the area above a cooktop as a feature zone. Pair with matte-black or dark-stained cabinetry, butcher-block countertops, and black iron pendant lights.
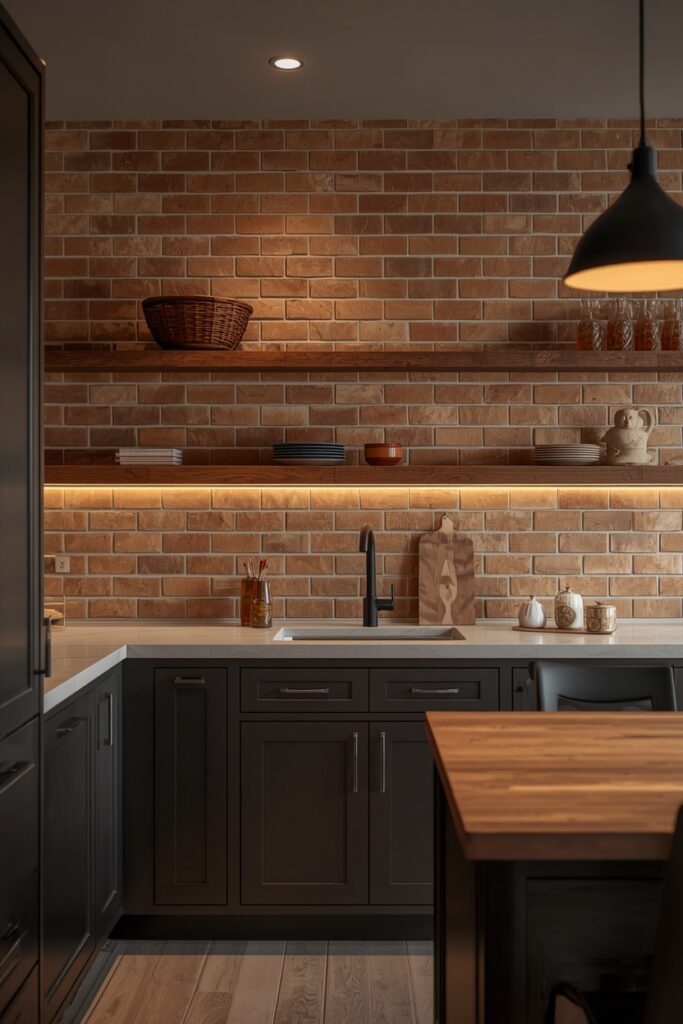
The tile surface should be sealed if it is a textured matte surface, as the crevices can collect grease over time. For the most realistic brick appearance, choose tiles with colour variation within each piece — tiles that are one uniform colour read more like ceramic than masonry. Under-cabinet LED lighting catches the surface irregularities and shadows beautifully.
14. Terrazzo Floor Tile for Contemporary Kitchens
Terrazzo — a composite of marble, quartz, or glass chips set in a cement or resin base — delivers a speckled, busy surface that hides dirt and wear better than almost any other kitchen floor material. Modern terrazzo tiles come in pre-cast 600 × 600 mm or 300 × 300 mm formats that are far easier to install than traditional poured-in-place terrazzo. Choose a warm palette: cream base with blush and terracotta chips, or pale gray base with white and charcoal chips.
Grout should match the base colour closely for a near-seamless look. Porcelain terrazzo-look tiles offer the aesthetic with zero maintenance, while genuine cement terrazzo tiles require sealing but reward with deeper colour and true material texture.
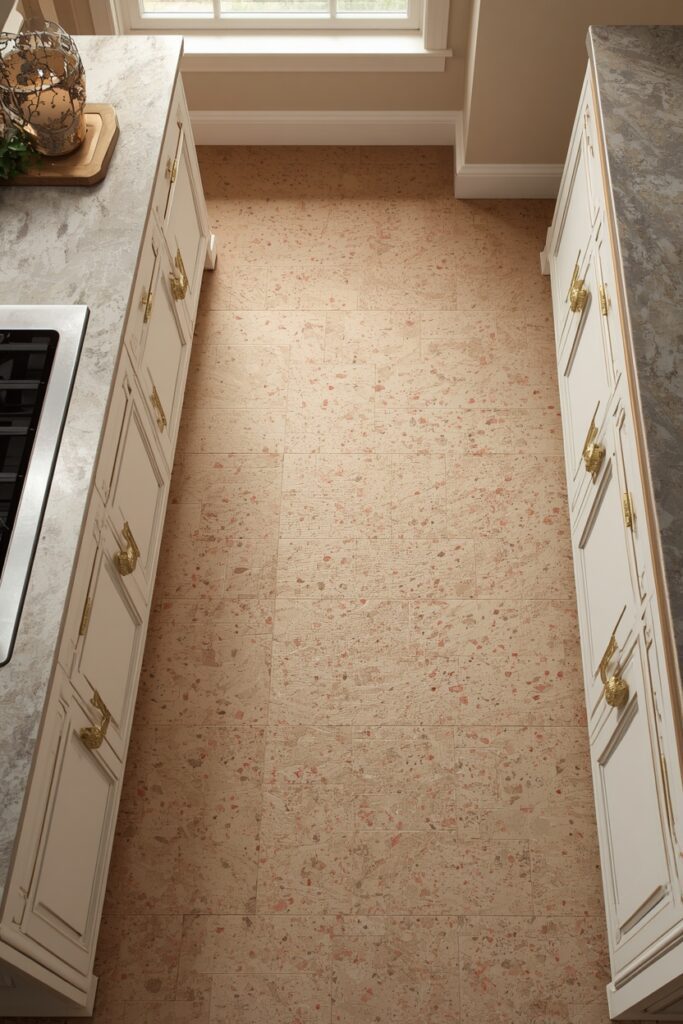
This floor suits contemporary kitchens with flat-panel cabinetry and clean countertops — the terrazzo pattern provides enough visual activity to carry the room without additional decorative surfaces.
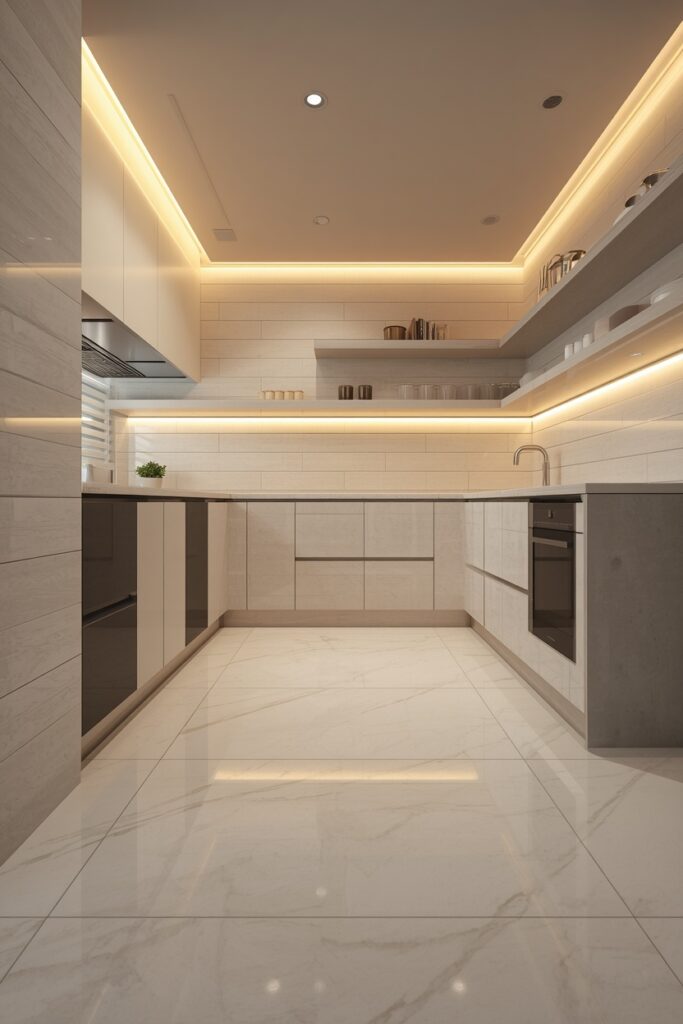
15. Floor-to-Ceiling Kitchen Tile Ideas for a Wrapped Effect
Tiling a kitchen from floor to ceiling in a single material — or in two closely related materials — creates a wrapped, immersive effect that makes the room read as one continuous surface. This approach suits open-plan kitchens where the tiled kitchen wall faces the living area, giving the kitchen a gallery-like presence. Use a large-format porcelain on the floor (600 × 600 mm or larger) and the same tile or a complementary smaller format on the walls and backsplash. Keep the colour neutral — warm white, pale concrete, or soft stone — so the wrap effect reads calm rather than busy. Grout colour must match the tile closely for the seamless illusion to hold. The design requires careful planning at transition points: where the floor meets the wall, use a matching porcelain trim or a shadow-gap detail rather than a standard tile edge strip. This is a professional installation that demands precision — misaligned grout lines at the floor-wall junction break the illusion immediately.
Where I’d Start if I Only Did Three Things
If I only did three things, I would start by choosing the floor tile first — it is the largest tiled surface and every other tile decision must coordinate with it. Second, I would hold physical samples of my floor tile and backsplash tile together under my kitchen lighting before ordering, because undertone clashes that are invisible online become obvious in person. Third, I would specify slip ratings for the floor (R10 minimum, R11 near the sink) before falling in love with a finish, because a beautiful floor tile that is dangerously slippery when wet is a liability.
Frequently Asked Questions
What kitchen tile ideas are best for high-traffic family kitchens?
Large-format porcelain tiles in a concrete or stone look are the most durable and lowest-maintenance option. They resist scratches, stains, and heavy foot traffic, and they require no sealing. A matte or textured surface provides better slip resistance than polished porcelain, especially near the sink and dishwasher where splashes are frequent.
Should kitchen floor tile and backsplash tile match?
They should coordinate, not necessarily match. Sharing the same undertone — both warm or both cool — creates cohesion without monotony. A common pairing is a neutral porcelain floor with a handmade backsplash tile in a complementary colour. Using the same tile on both surfaces is an option for a wrapped effect, but it works best when the tile is simple and neutral.
How do I choose between porcelain and ceramic tile for a kitchen?
Porcelain is denser, harder, and less porous than ceramic, making it the better choice for kitchen floors and areas exposed to water. Ceramic is lighter, easier to cut, and more affordable, making it suitable for backsplashes and wall applications where wear resistance is less critical. For kitchen floors specifically, porcelain is the professional recommendation.
What tile pattern makes a small kitchen look bigger?
Large-format tiles with minimal grout joints create fewer visual breaks, making the floor read as a larger surface. Laying rectangular tiles in a diagonal or herringbone pattern adds perceived width. Light-coloured tiles with a satin or matte surface reflect enough light to open the space without the glare of polished surfaces.
Final Thoughts
The strongest kitchen tile ideas treat the floor, walls, and backsplash as one coordinated system rather than three separate decisions. Start with the floor — it is the largest surface and it sets the tone — then choose a backsplash that shares its undertone and a grout colour that ties the room together. Test physical samples under your actual kitchen lighting before ordering, specify slip ratings for every floor tile, and seal anything porous at installation. A well-tiled kitchen is one of the longest-lasting renovations you can make, so the upfront planning pays dividends for years.